Sunday, 12 January 2014

Final Edits

Here are my final edits from shooting at the flooded sports field. 

Timelapse

I'm really pleased with how this came out, I managed to mask out most of the marks by manually adjusting the masks to use the best parts of each photo. Anything that I couldn't remove through this method was removed using the spot healing tool.


Plane

This is the one I quickly shot while the plane flew over. Unfortunately because I wasn't expecting it, I rushed it a little so the plane didn't travel that much between each shot. It still looks pretty cool though.


Ripple

This is the one where the kids threw some sticks into the water. I managed to mask the photos so that most of the ripples are in the final image. Quite a cool effect, if this had been combined the time lapse I think that could've made for a really interesting image.


Saturday, 11 January 2014

Final Shooting Pt 2

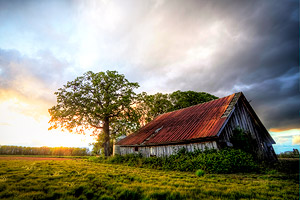
After the last panorama on the road bridge I packed up and started walking back towards my house thinking that I needed to seriously rethink my locations. Whilst walking back I remembered about the Sports fields next to the County Cricket Club that's always flooded at this time of year. I walked up there to find it looking more like a lake than a field!

The lighting was fantastic and because the water was still, it reflected the sky brilliantly creating a nice balanced image that looks kind of surreal and enticing. I'd liked to have gotten a lower angle but I had to stay behind the fence because I didn't want to fall in with the camera! I wasn't quite able to get a full 180 degrees here because of trees, fences and other unwanted elements but I still managed to achieve a pretty wide field of view.

Here's the first attempt, not bad at all! I'm really pleased with the composition of this, I tried to loosely follow the rule of thirds to ensure the image was spatially balanced. 


In this one I was midway through shooting when some passing children threw some sticks into the water. At first I thought this would've caused problems when stitching but it actually looks pretty cool. It needs some manual adjustment to be properly seamless.


One thing I didn't notice until I got home is that on quite a few of my images there is some kind of dark smear on them. I couldn't see this on the viewfinder at all. I made sure to clean the lens when setting up at each location so I don't think this was the issue. The lens has marks where it looks to have taken a fairly serious fall at some point so I think that this may be the reason for the smear. 

I think I will most likely just try to eliminate them by adjusting the layer masks to hide them. If this isn't possible I'll have a go at manually removing it using the cloning tool in Photoshop.

On this one, I'd just started shooting from the right hand side when I looked up briefly to find a single engine airplane flying directly towards me at a fairly low altitude. I thought it'd be great if I could capture this in the scene and quickly started a new panorama. I was thinking I'd maybe be able to mask the images so that the plane is visible in each shot, therefore showing the path of the plane, capturing a movement that you normally wouldn't be able to. I tried this out and it didn't really work as it I'd imagined, the distance the plane had moved in each shot was not enough to create the effect I wanted. I think I was just too eager to capture it, had I been calm I could've waited for the plane to move more between shots. I ended up just leaving one shot of the plane in as I think it makes a nice addition to the scene. I had a go at removing the smears in this one by masking them out and it worked pretty well.


The Timelapse

Once I'd had several goes at it I thought I would create a timelapse of this scene similar to what I was planning for the Sabrina Bridge idea. The problem with this was that the tripod doesn't have angle markers so I had no way to know how much I was actually moving the camera. I did try to create markers on a piece of tape around the tripod but it didn't work that well. 

Because I had to guess the amount of overlap between photos I was able to concentrate less on the timing of the shots. I looked online the night before to check when the sun would set and it was supposed to be 4:15pm. I started at around 4, taking a photo every 30 seconds over the course of 12 minutes. I expected it to be quite a bit darker than it was by the time I reached the end of my panorama but I still think it's a nice effect, especially as it gets darker towards the moon side.


Obviously for the final image I will mask all of the smears out but I'm pretty happy with this result.

Final Shooting Pt 1

So we finally got a nice bright sunny day! Time to shoot my panorama at the bridge.. or so I thought.

After getting down there and setting up I quickly began to realise the number of problems with this idea.

Firstly, the sun was directly behind me at a low angle meaning I had no way of getting my own shadow out of the shot. Another problem was that it was much busier than I expected which meant I wasn't able to compose the shots how I wanted them. An unexpected problem was that the bridge actually moves a fair amount when several people walk across it, which of course creates problems when it comes to stitching the photos. 

I think that these attempts show this idea had potential but there were simply too many issues.


It wasn't long before I knew this idea wasn't going to work out. Determined to make the most of such brilliant lighting, I packed up and started walking. I decided I'd try out some angle from the road bridge facing the cathedral. It was a fairly nice scene but it was very busy on the pavement and it was very difficult to make use of a panorama when either side your scene are unwanted things such as Premier Inns!

Here's what I managed to get from this location:


This one actually came out quite nicely but I wish I'd shot it the camera mounted vertically so that I could have kept the bottom of this Panorama in showing the curved ledge.


In this one I tried to include the street lamp but this kind of throws off the balance of the image because I couldn't go too far to the left because of my shadow.


I just wasn't satisfied with this scene, the composition was too difficult to balance due to the unevenness of the bridge and the water wasn't reflecting the sky as well as I'd wanted.

I moved on after this one.

Friday, 10 January 2014

Wide Angle 180 Stitching Tests

As I said in my previous post, I thought it'd be a wise idea to test shoot some 180 degree panoramas with the 10-20mm lens I intend to use. I thought a great test for this was the coregated metal fence on my back garden due to all of the intersecting lines. I thought this would be a real challenge for Photoshop to stitch.

To see which focal length produces the best results I shot the same panorama 3 times, each with a different focal length:

10mm

Photoshop didn't really know what to do with these images because the distortion was too great. I did expect this due to the research I've done. Most recommend shooting at 15mm and upwards.


15mm

I was quite suprised to see that Photoshop had no problem stitching these photos. I quite like the distorted effect it creates.


20mm

Of course these ones stitched together just fine, it seems obvious to me I'm best to stay between the 15-20mm range to create a successful panorama. Common focal lengths recommended online seem to be either 16mm or 18mm. 


Saturday, 4 January 2014

Panoramas at 10-20mm

Out of all the panoramas I've looked at, I've mostly enjoyed the wide angle ones. I did some research into panoramas created with focal lengths between 10-20mm, mainly in order to see if the lens distortion would create problems when it comes to stitching the images.

I came across a few flickr discussions that gave some useful advice. When shooting panoramas with a 10-20mm lens the closer you get to 10mm, the greater the lens distortion. This of course causes problems when it comes to stitching them together because the edges don't match up. There are two main things you can do to minimise these problems, the first is of course keep to 16-20mm as these will provide the least distortion. The other thing you can do it to use more overlap between photos so that the software will have an easier time stitching.


This image shows how an image can be balanced using reflection. This is what I'm imagining for the Sabrina Bridge panorama.


https://www.flickr.com/groups/panoramas/discuss/72157624628899419/

HDR Images


After looking through quite a few panoramas, it seems a lot of them employ HDR techniques in order to create such colourful and surreal images.

After some reading it seems like this technique is particularly useful in situations where it's difficult to get an even exposure in your scene. For example in a landscape scene it may be the case that you can have the foreground correctly exposed but with overexposed skies, or underexposed foreground and correctly exposed sky. A common method is to do both exposures and then use software such as Photoshop to combine the exposures into one image, thus resulting in an even exposure throughout.

Here is two of the more informative articles I read on this process:

http://www.cambridgeincolour.com/tutorials/high-dynamic-range.htm

http://www.picturecorrect.com/tips/how-to-do-hdr-photography/

If this technique is necessary in order to achieve consistent exposure I may use it for my final wide angle landscape image.